> ## Documentation Index
> Fetch the complete documentation index at: https://docs.pushbase.dev/llms.txt
> Use this file to discover all available pages before exploring further.
# Deep linking
> Route users to specific screens on tap
Prerequisite: To enable deep linking, you must define your app’s scheme in the
`app.json` file.
```json app.json theme={null}
{
"expo": {
// replace this with your app scheme
"scheme": "myapp"
}
}
```
The Pushbase SDK supports deep linking, provided that the route is defined according to your app’s navigation structure.
To navigate a user to a specific screen via a notification, include the target route in the notification payload. When deep linking is enabled, the SDK automatically handles routing the user to the specified screen upon interaction.
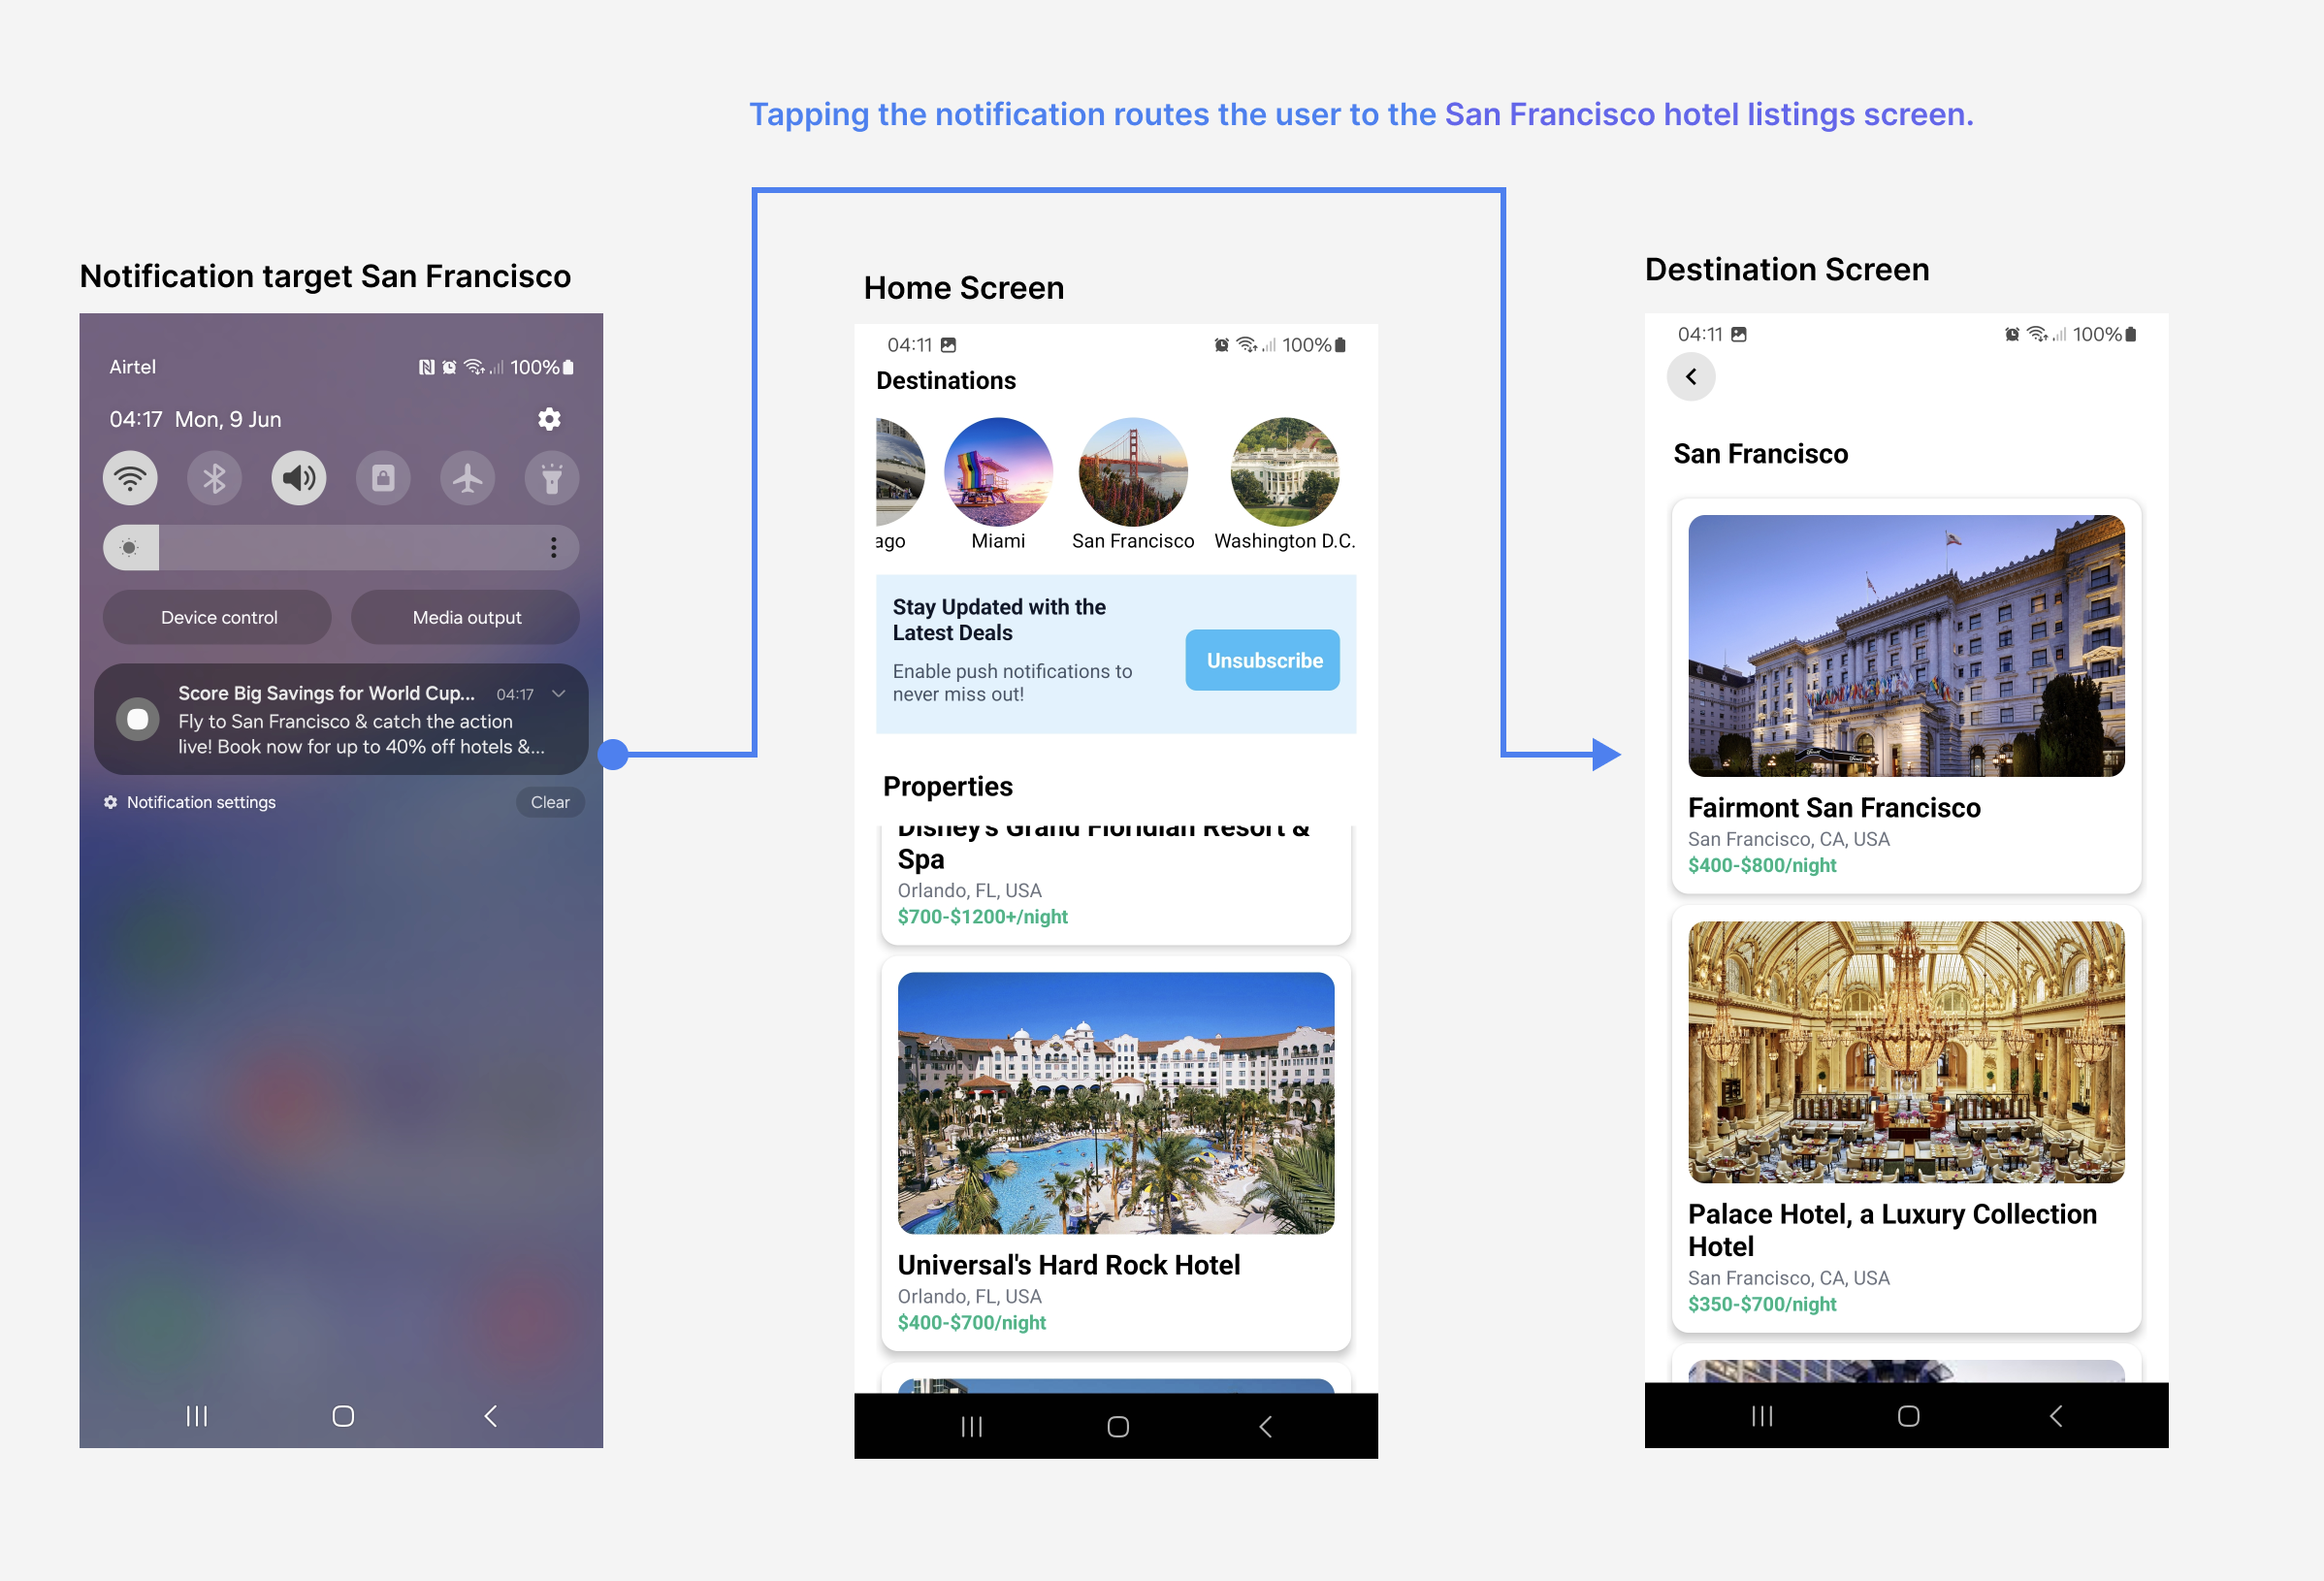
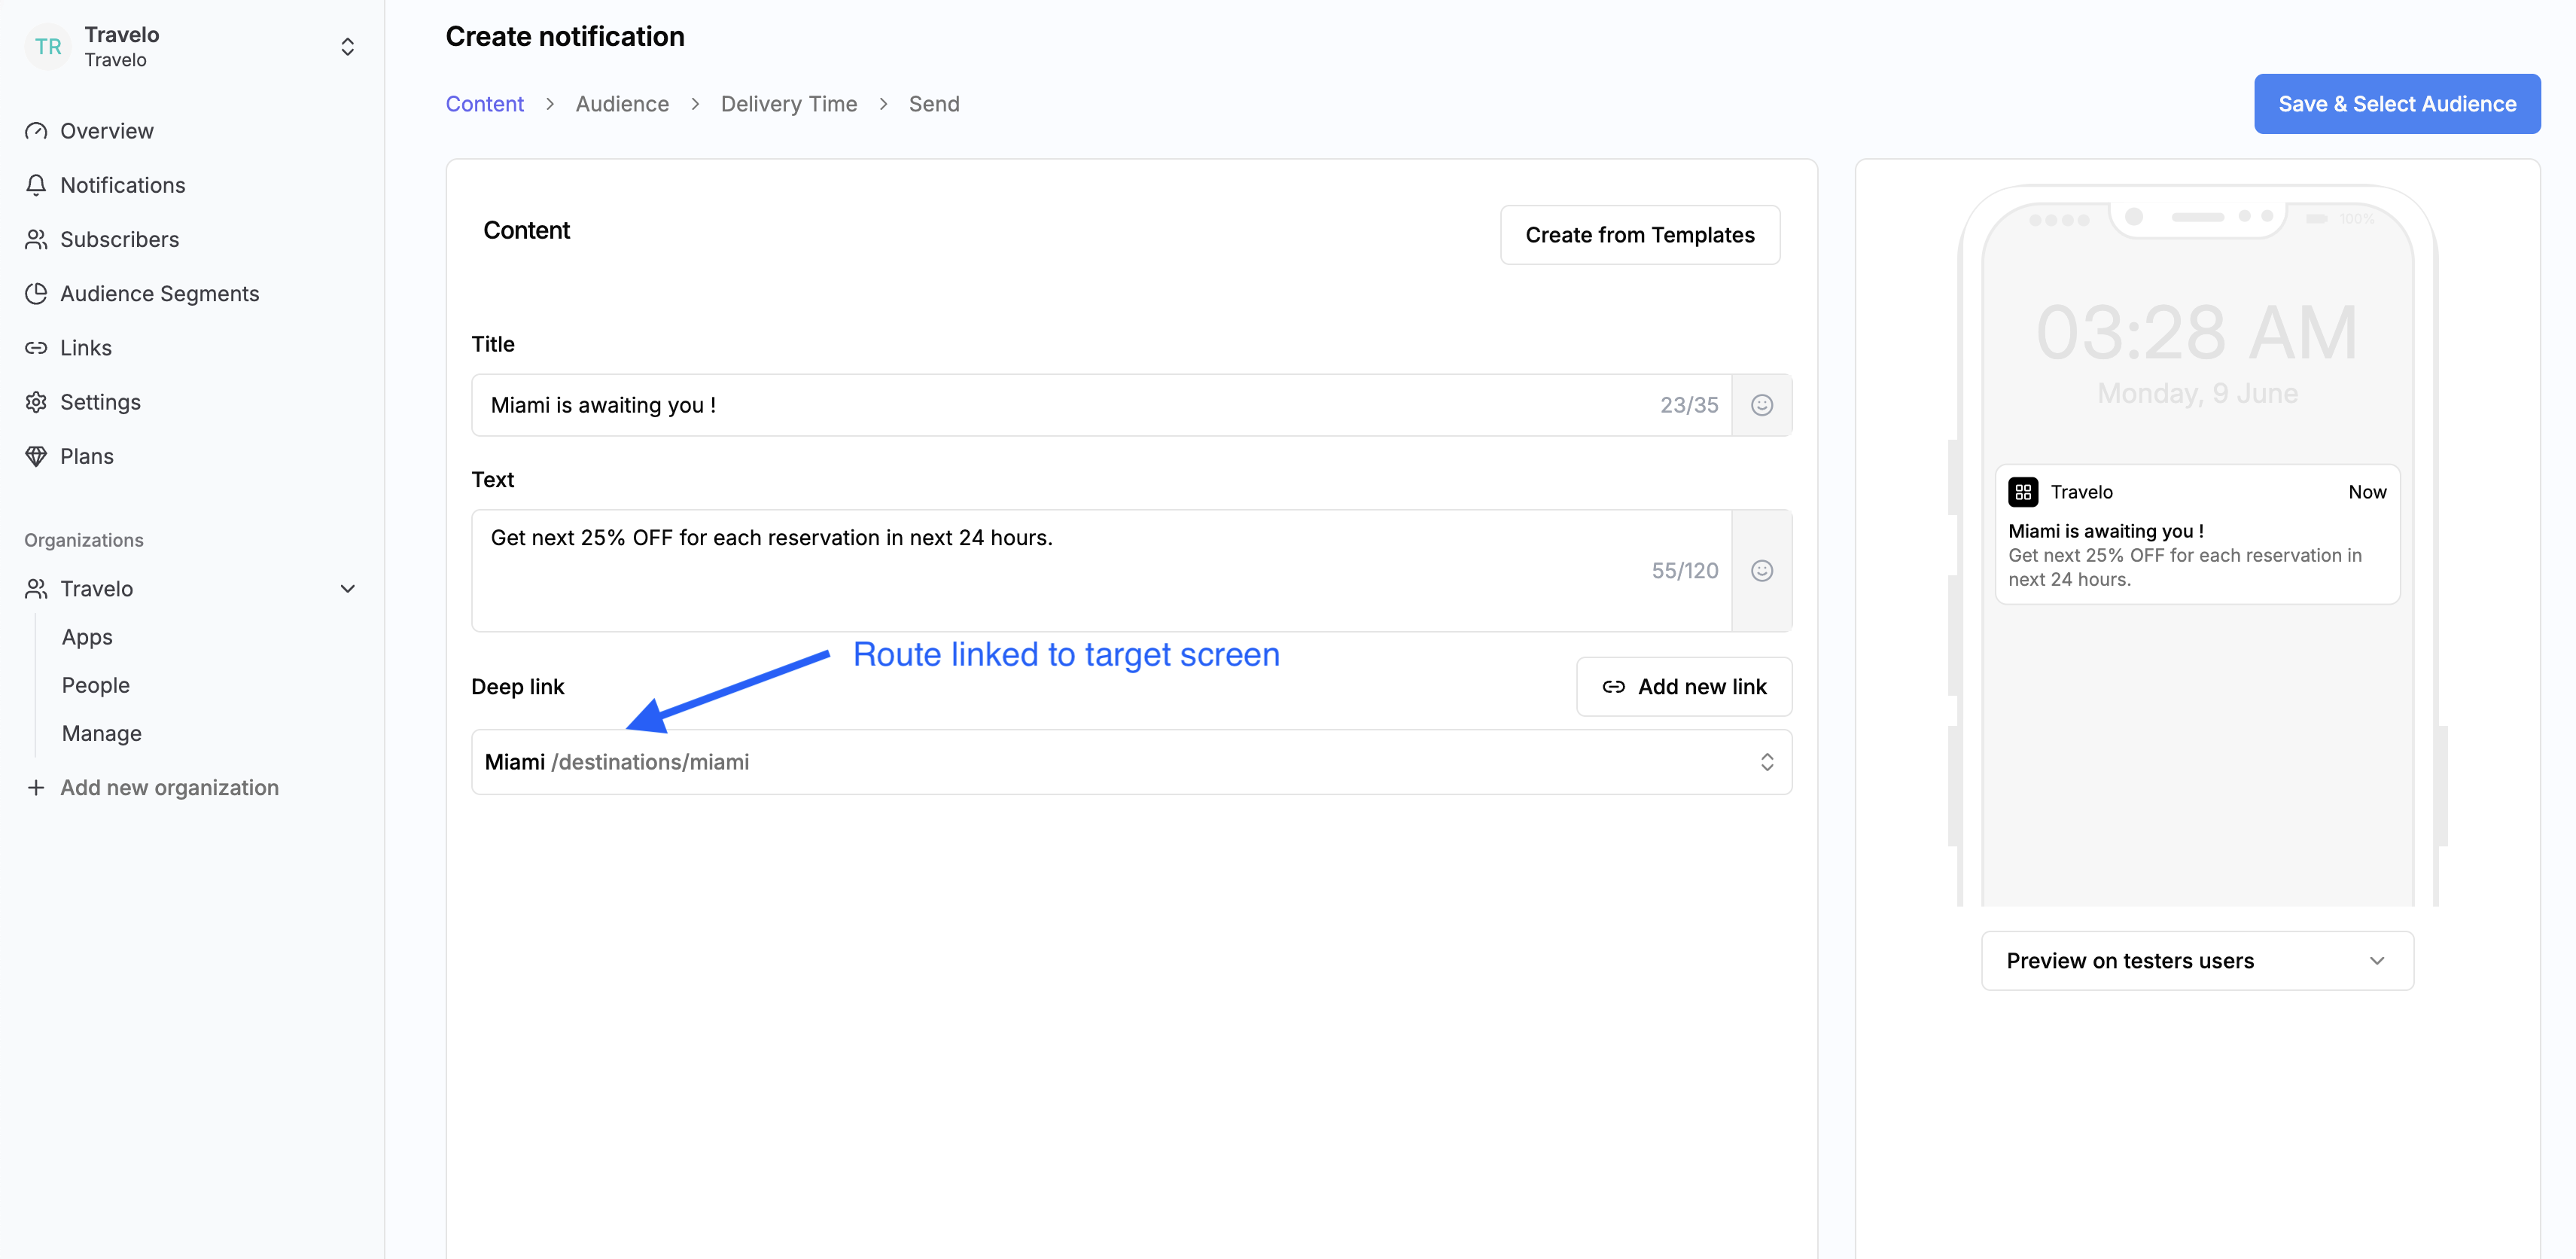 To illustrate how deep linking works with the Pushbase SDK, consider a travel app that lists hotels across major U.S. cities.
Suppose the marketing team wants to send push notifications featuring city-specific discount codes. When a user taps on a notification, the app should automatically navigate to the targeted city and display a list of hotels specific to that location.
To illustrate how deep linking works with the Pushbase SDK, consider a travel app that lists hotels across major U.S. cities.
Suppose the marketing team wants to send push notifications featuring city-specific discount codes. When a user taps on a notification, the app should automatically navigate to the targeted city and display a list of hotels specific to that location.
 To enable this deep linking behavior, the app’s file structure should be organized based on the navigation strategy being used— **Expo Router** or **React Navigation**. Each approach requires a different configuration to correctly handle and route deep link URLs to the targeted screen.
```yaml Expo Router Project structure theme={null}
.
└── app/
├── _layout.tsx
├── destinations/
│ └── [slug].tsx
└── index.tsx
```
`destinations/[slug]` is a dynamic route, where `slug` is a unique identifier
representing each city's route.
```yaml React Navigation Project structure theme={null}
.
├── screens/
│ ├── HomeScreen.tsx
│ └── DestinationScreen.tsx
└── App.tsx
```
Screen route names and configurations in React Navigation are managed using a
[Stack Navigator](https://reactnavigation.org/docs/stack-navigator/)
```jsx App.tsx theme={null}
import { NavigationContainer } from "@react-navigation/native";
import { createStackNavigator } from "@react-navigation/stack";
const Stack = createStackNavigator();
export default function App() {
return (
);
}
```
## Defining deep links
A deep link to a specific destination screen should
follow this format:
To enable this deep linking behavior, the app’s file structure should be organized based on the navigation strategy being used— **Expo Router** or **React Navigation**. Each approach requires a different configuration to correctly handle and route deep link URLs to the targeted screen.
```yaml Expo Router Project structure theme={null}
.
└── app/
├── _layout.tsx
├── destinations/
│ └── [slug].tsx
└── index.tsx
```
`destinations/[slug]` is a dynamic route, where `slug` is a unique identifier
representing each city's route.
```yaml React Navigation Project structure theme={null}
.
├── screens/
│ ├── HomeScreen.tsx
│ └── DestinationScreen.tsx
└── App.tsx
```
Screen route names and configurations in React Navigation are managed using a
[Stack Navigator](https://reactnavigation.org/docs/stack-navigator/)
```jsx App.tsx theme={null}
import { NavigationContainer } from "@react-navigation/native";
import { createStackNavigator } from "@react-navigation/stack";
const Stack = createStackNavigator();
export default function App() {
return (
);
}
```
## Defining deep links
A deep link to a specific destination screen should
follow this format:
- `destinations/san-francisco` - San Francisco
- `destinations/new-york-city` - New York City
- `destinations/miami` - Miami
- `destinations/washington-dc` - Washington DC
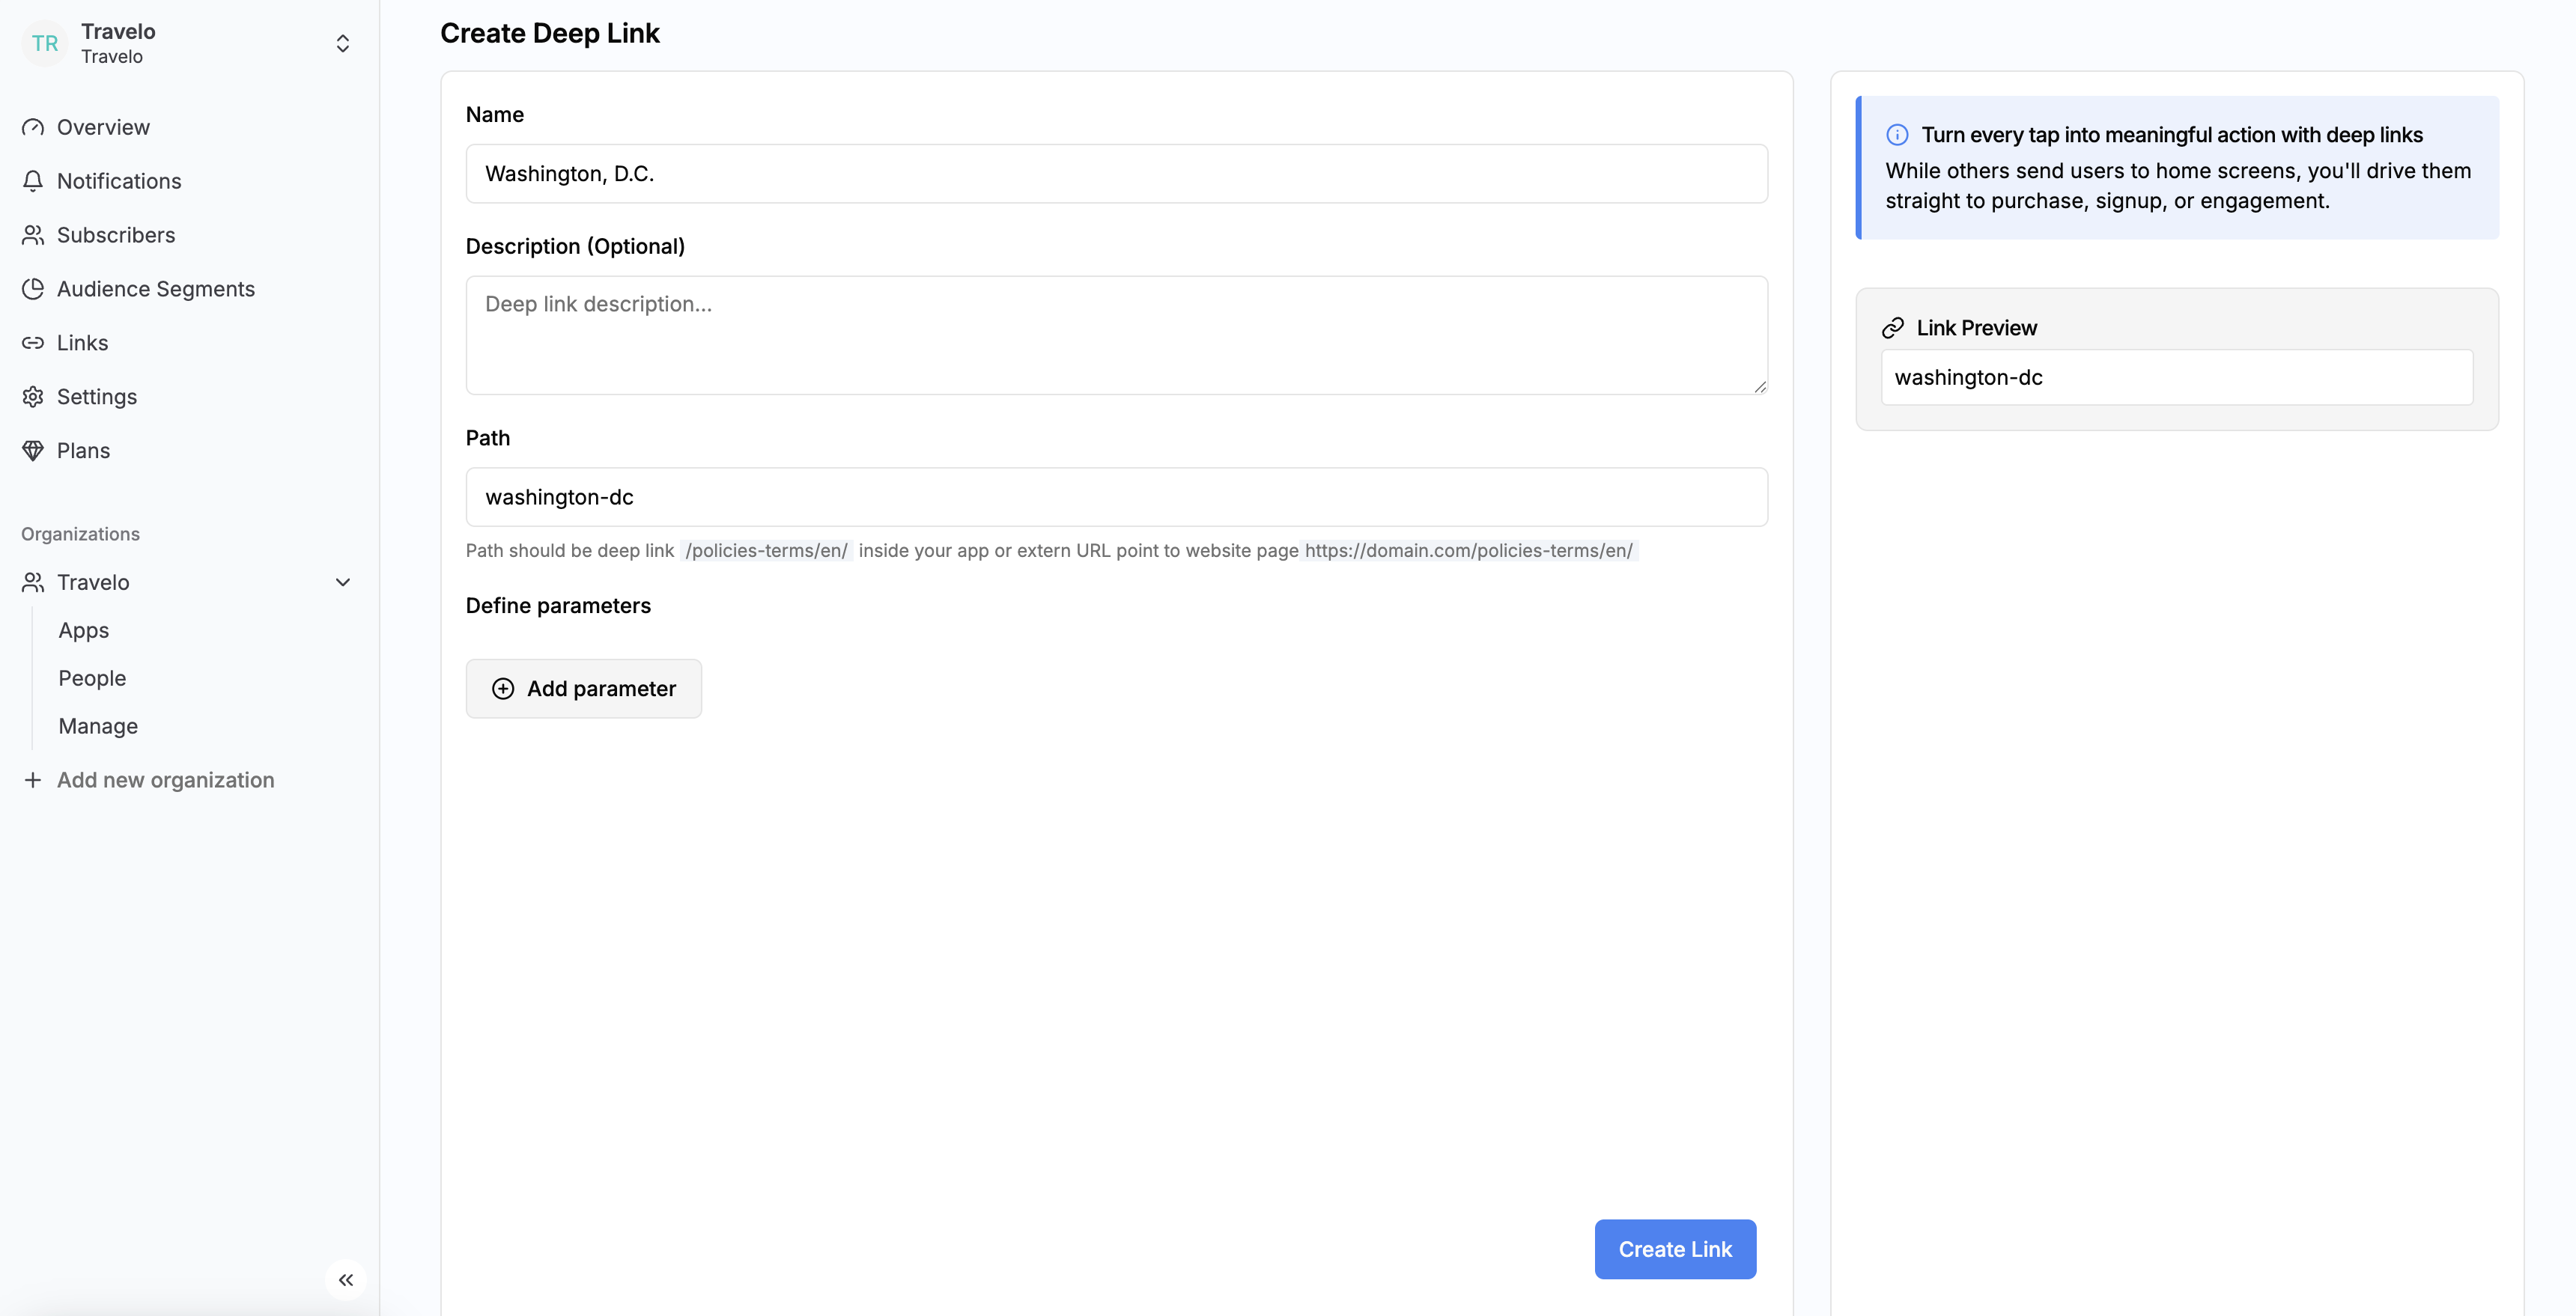
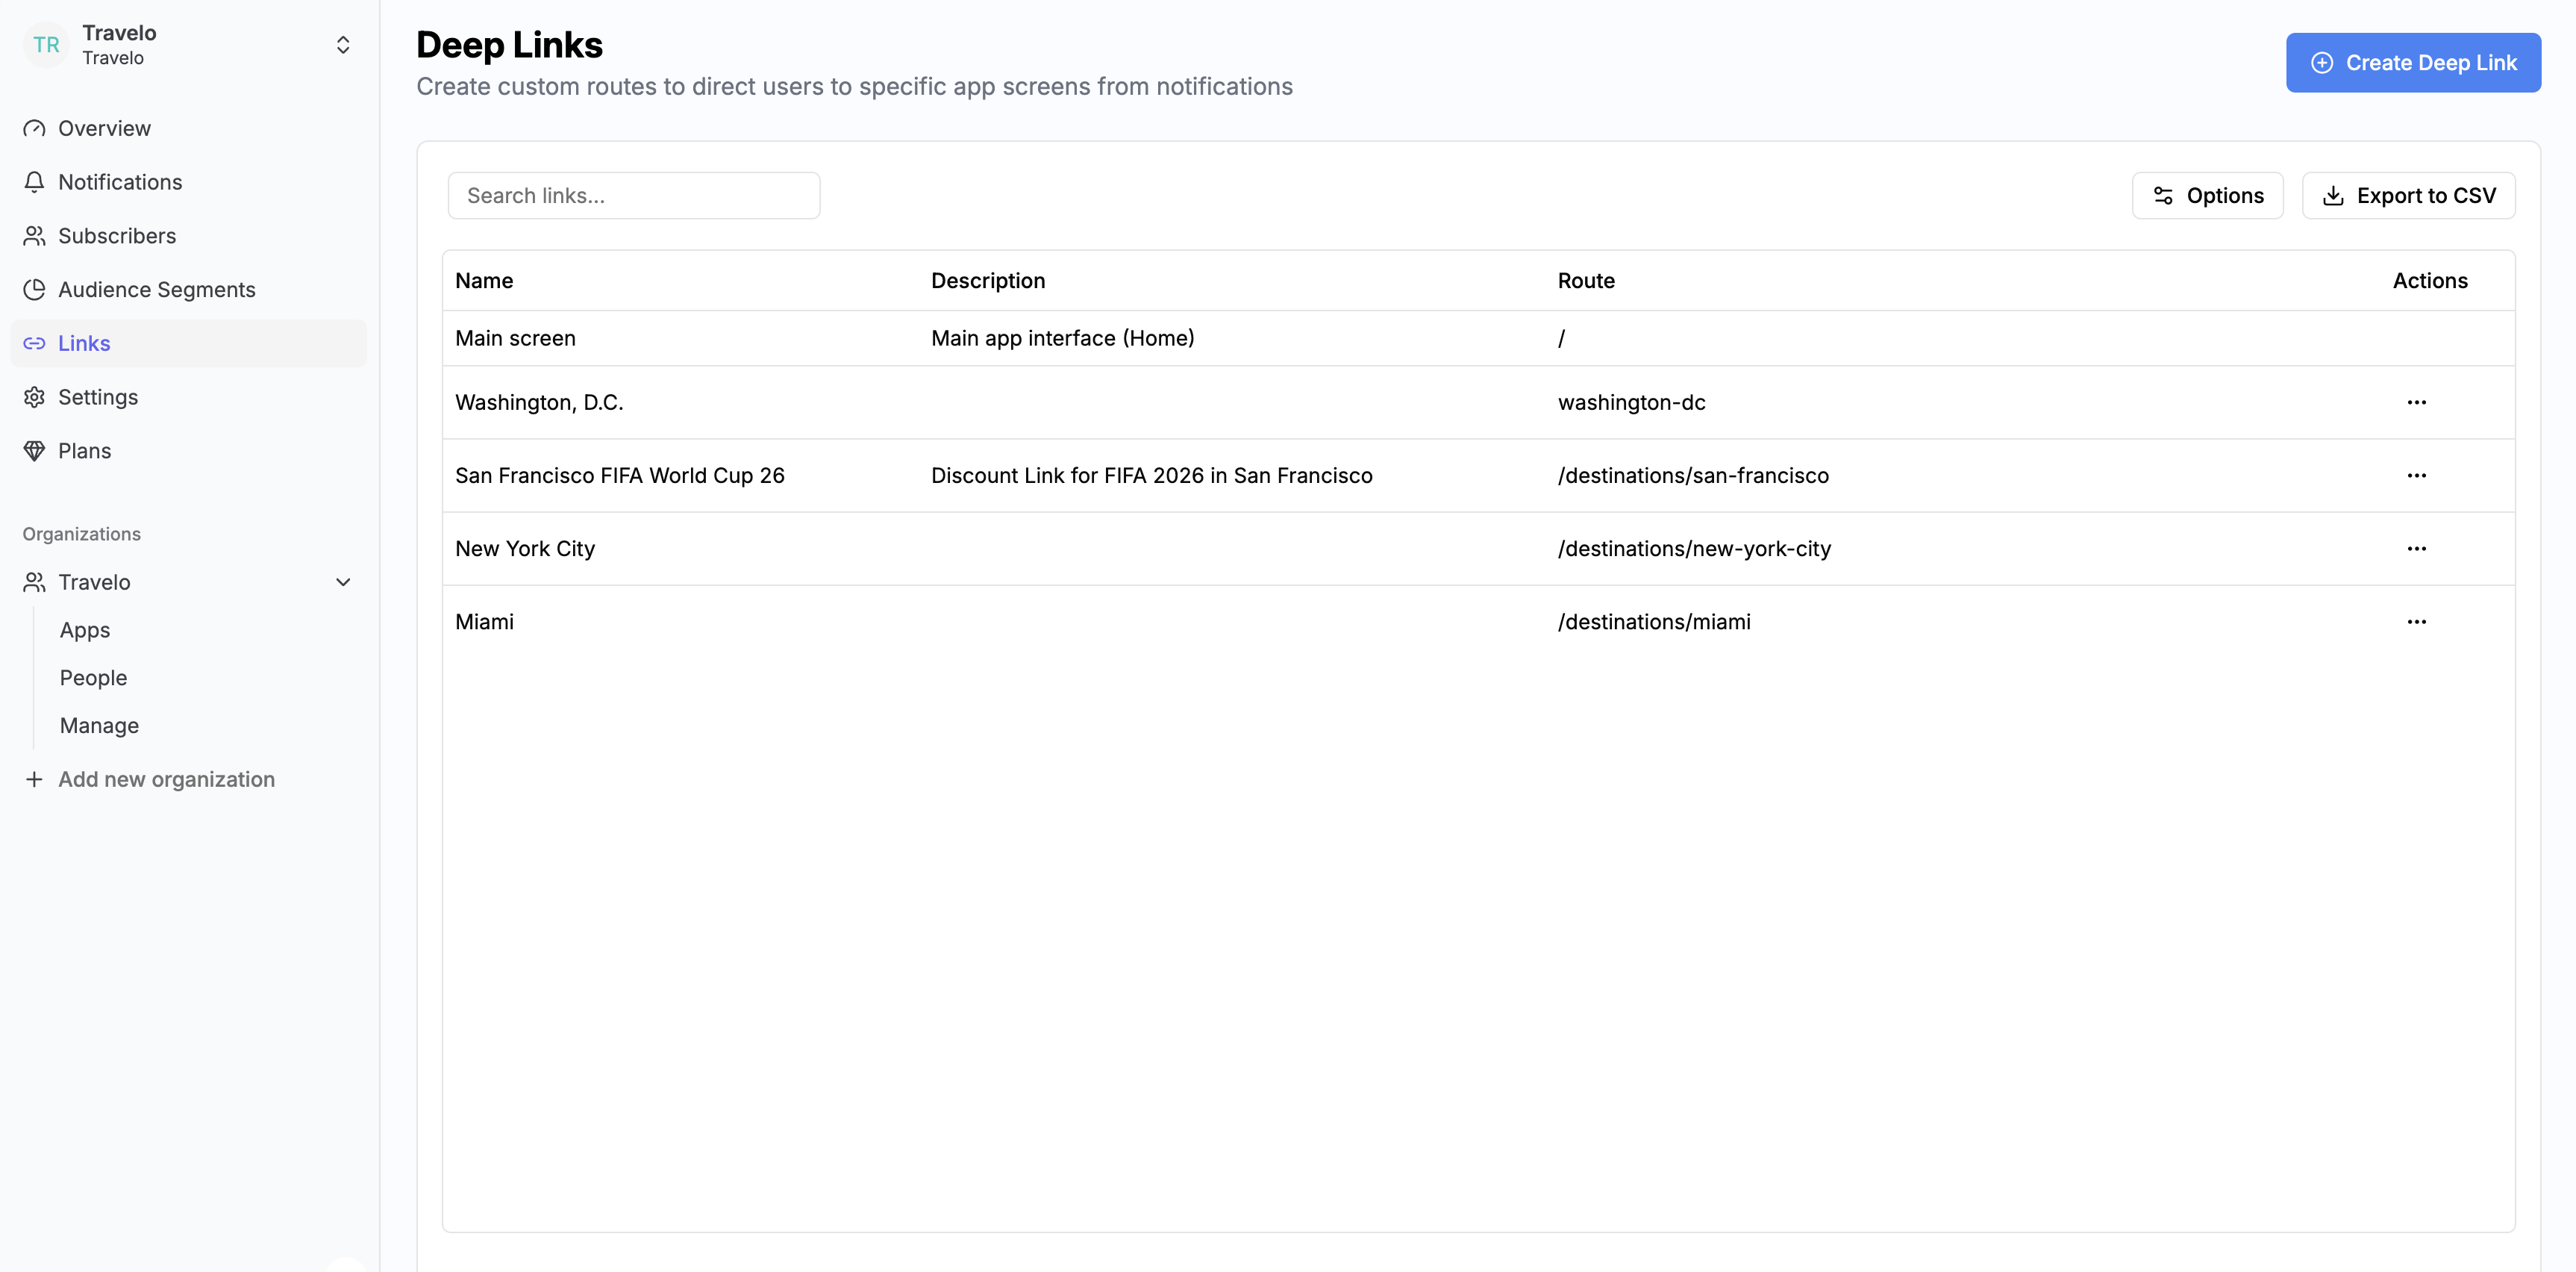
All deep links are configured and attached to notifications directly through the Pushbase dashboard.
**Create a deep link**
 **List of deep links**
 **Assign deep link to a notification**
## Handle Deep Link Routing
With Expo Router, Pushbase SDK automatically handles deep link navigation when a user taps on a notification that includes an assigned deep link. No extra works needed.
React Navigation’s [linking configuration](https://reactnavigation.org/docs/navigation-container#linking) can be used to handle incoming deep links from push notifications.
This involves mapping defined deep link routes to their corresponding screen route names within your navigation structure.
**Prerequisite**: install `expo-linking` package.
```bash theme={null}
npx expo install expo-linking
```
```js theme={null}
import { NavigationContainer } from "@react-navigation/native";
import { createStackNavigator } from "@react-navigation/stack";
import * as Linking from "expo-linking";
const Stack = createStackNavigator();
/* Map deep linking route to screen name.*/
const config = {
screens: {
// The slug value will be replaced by city value like san-francisco or miami.
Destination: "destinations/:slug",
},
};
const linking = {
prefixes: [prefix],
config,
};
export default function App() {
return (
);
}
```
The reason that is necessary to use `Linking.createURL` is that the scheme
will differ depending on whether you're in the client app or in a standalone
app
Having trouble setting up or configuring the SDK? Our support team is here to
help — [feel free to reach
out](mailto:hello@pushbase.dev?subject=Pushbase%20Product%20Support)
**Assign deep link to a notification**
## Handle Deep Link Routing
With Expo Router, Pushbase SDK automatically handles deep link navigation when a user taps on a notification that includes an assigned deep link. No extra works needed.
React Navigation’s [linking configuration](https://reactnavigation.org/docs/navigation-container#linking) can be used to handle incoming deep links from push notifications.
This involves mapping defined deep link routes to their corresponding screen route names within your navigation structure.
**Prerequisite**: install `expo-linking` package.
```bash theme={null}
npx expo install expo-linking
```
```js theme={null}
import { NavigationContainer } from "@react-navigation/native";
import { createStackNavigator } from "@react-navigation/stack";
import * as Linking from "expo-linking";
const Stack = createStackNavigator();
/* Map deep linking route to screen name.*/
const config = {
screens: {
// The slug value will be replaced by city value like san-francisco or miami.
Destination: "destinations/:slug",
},
};
const linking = {
prefixes: [prefix],
config,
};
export default function App() {
return (
);
}
```
The reason that is necessary to use `Linking.createURL` is that the scheme
will differ depending on whether you're in the client app or in a standalone
app
Having trouble setting up or configuring the SDK? Our support team is here to
help — [feel free to reach
out](mailto:hello@pushbase.dev?subject=Pushbase%20Product%20Support)